Collecting Custom Diagnostic Dumps using Coda
This documentation page provides step-by-step instructions on how to use EdgeIQ's enhanced log collection feature to retrieve custom files and entire folders from your Coda-based devices. Learn how to download specific application logs or any diagnostic dump for advanced remote troubleshooting.
The EdgeIQ platform provides robust tools for monitoring and managing your edge devices. A key part of remote troubleshooting is the ability to retrieve log files. This document outlines the enhanced log collection feature, which allows you to request and download specific, arbitrary files or entire folders from your Coda-based devices, in addition to the standard system logs.
This is particularly useful for debugging custom applications running on your devices, as you can now retrieve application-specific logs, configuration files, or any other file you need without requiring direct terminal access.
Prerequisites
- You must have an active EdgeIQ account with appropriate permissions.
- The target device must have coda agent installed and running.
- The device must be Online and connected to EdgeIQ to receive and execute commands.
- You must know the absolute path to the file or folder you wish to retrieve from the edge device.
How to Upload a Custom Log File or Folder
Follow these steps to request a specific diagnostic file or folder from a device and upload it to the EdgeIQ cloud for download.
Step 1: Navigate to the Device
- From the EdgeIQ dashboard, click on Devices in the left-hand navigation menu.
- Use the search and filter tools to locate the device you want to investigate.
- Click on the device to open its details page.
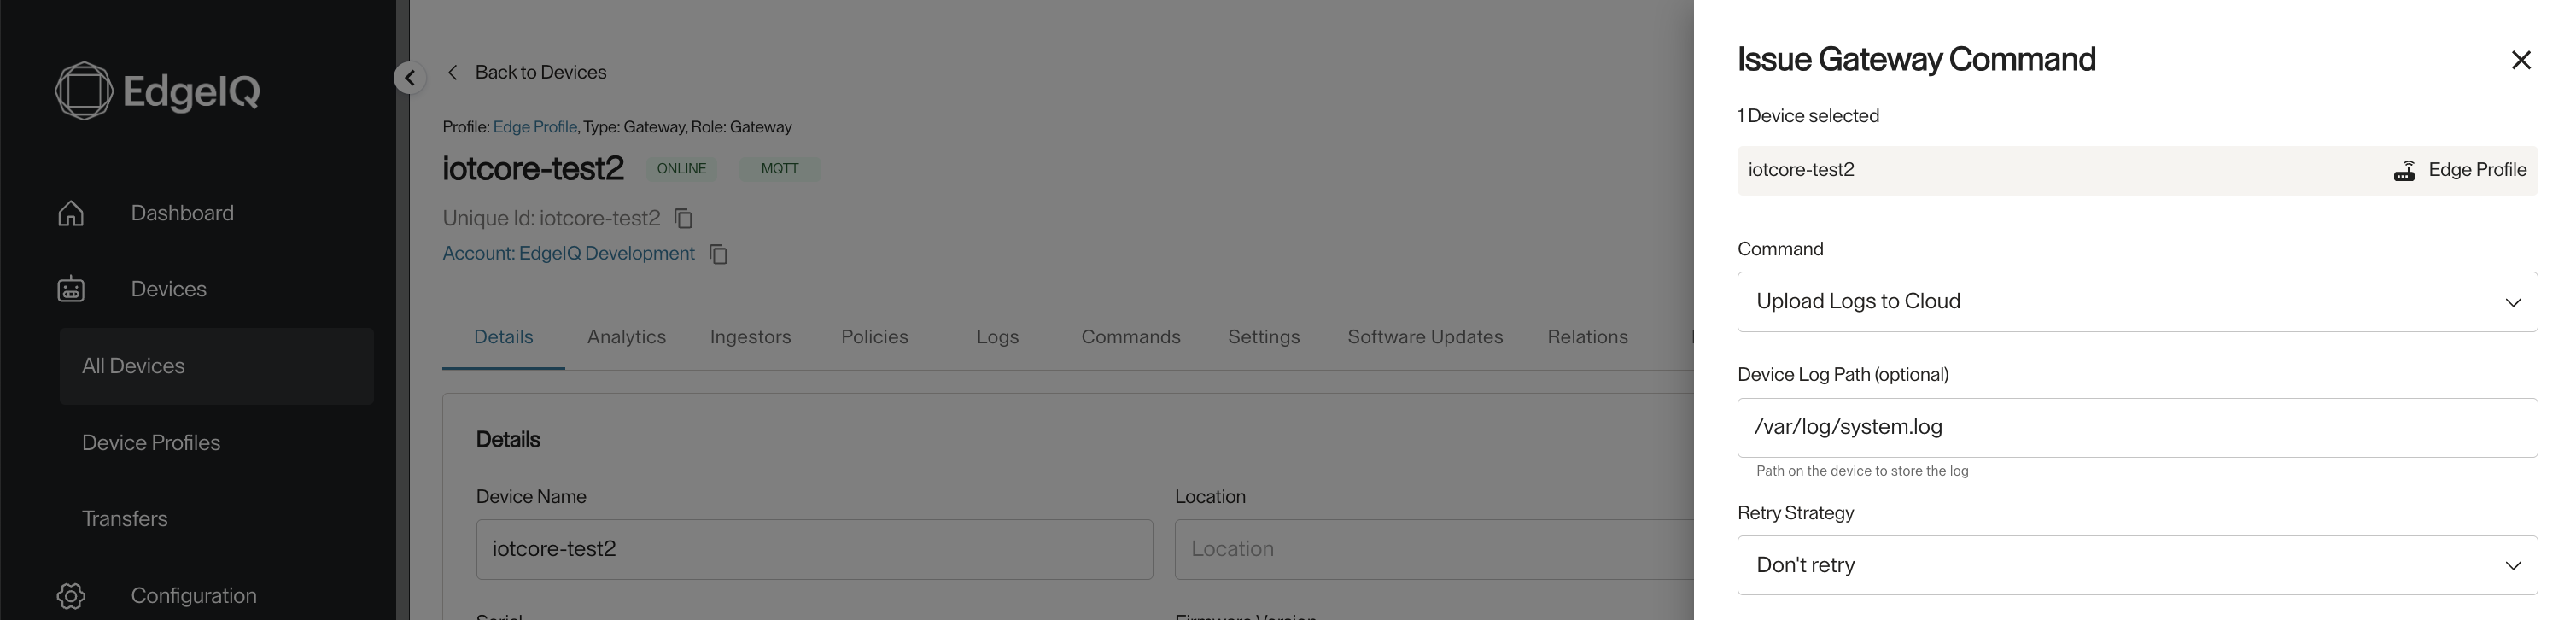
Step 2: Issue a Gateway Command
- On the device details page, locate the Device Activity panel on the right side.
- Click the action button (it may be labeled Recent Gateway Commands or similar) to open a dropdown menu.
- Select Issue Gateway Command.
Step 3: Configure the Log Upload Command
-
In the Issue Gateway Command dialog box that appears, click on the Command dropdown menu.
-
Scroll through the list and select Upload Logs to Cloud.
-
A new optional field will appear: Device Log Path.
- To download a specific file or folder, enter the full, absolute path in this field. For example, to retrieve the logs for a custom application, you might enter:
/tmp/companion-app-logs - If you leave this field blank, the system will retrieve coda agent logs from the device.
- To download a specific file or folder, enter the full, absolute path in this field. For example, to retrieve the logs for a custom application, you might enter:
-
Click the Issue button to send the command to the device.
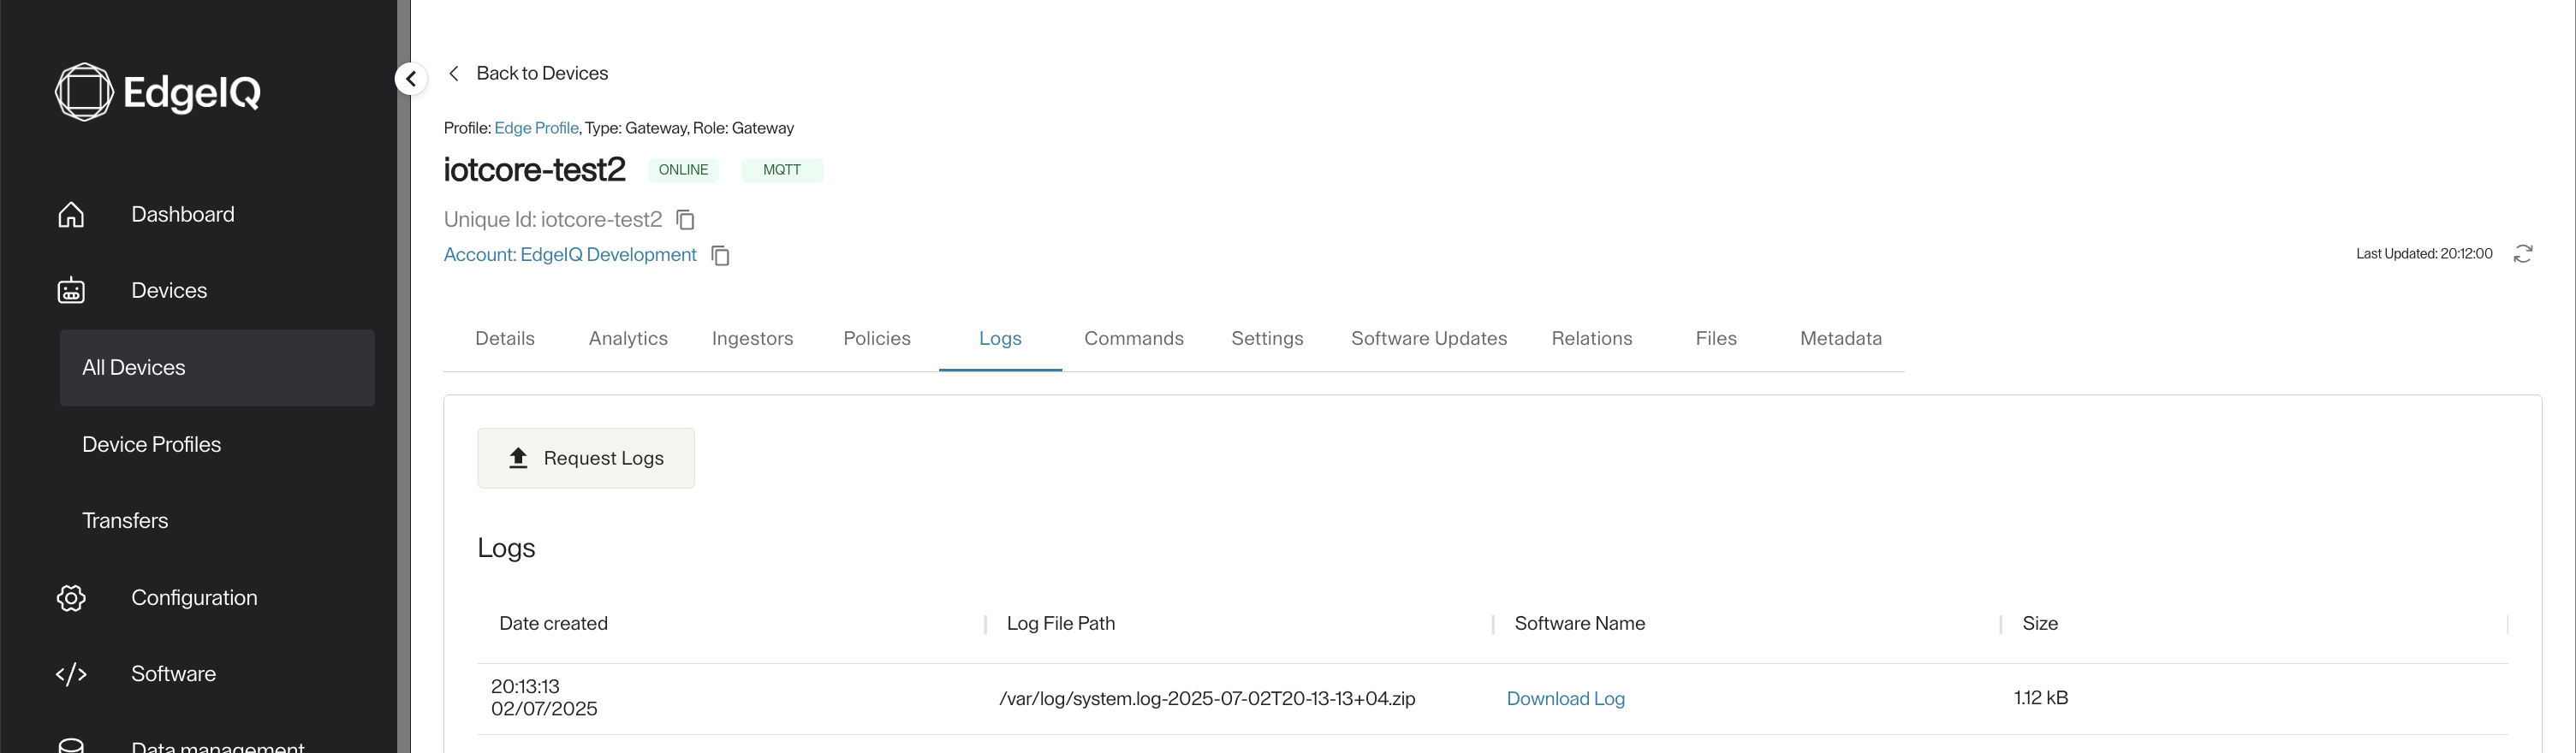
Step 4: Access and Download the Logs
-
After issuing the command, navigate to the Logs tab on the device details page.
-
The system will process the request. Once complete, a new entry will appear at the top of the log list.
- You can identify your custom request by looking at the Log File Path column. It will contain the path you specified.
- If you requested a folder, EdgeIQ automatically compresses the contents and appends the date and time to the folder name, creating a
.ziparchive.
-
Click the Download Log link next to the new entry to download the file to your local machine.
Step 5: Review the Logs
Once downloaded, you can open the file (or unzip the archive) to view the contents and continue your troubleshooting.
Key Behaviors and Notes
- Standard vs. Custom Logs: Clicking the main Request Logs button on the
Logstab is a shortcut to issuing theUpload Logs to Cloudcommand without a specified path, which retrieves only the coda agent device logs. - Folder Compression: When you provide a path to a folder, the device agent will compress the entire folder into a single
.zipfile for a convenient, one-click download. - Identification: The custom path you provide is used to name the resulting log entry in the UI, making it easy to distinguish between standard logs and specific diagnostic dumps you have requested.
Updated 10 months ago