Transfer a Gateway Device Using Escrow Devices
In this section, learn about the escrow device transfer process. The diagram below depicts the workflow from the customer to EdgeIQ.
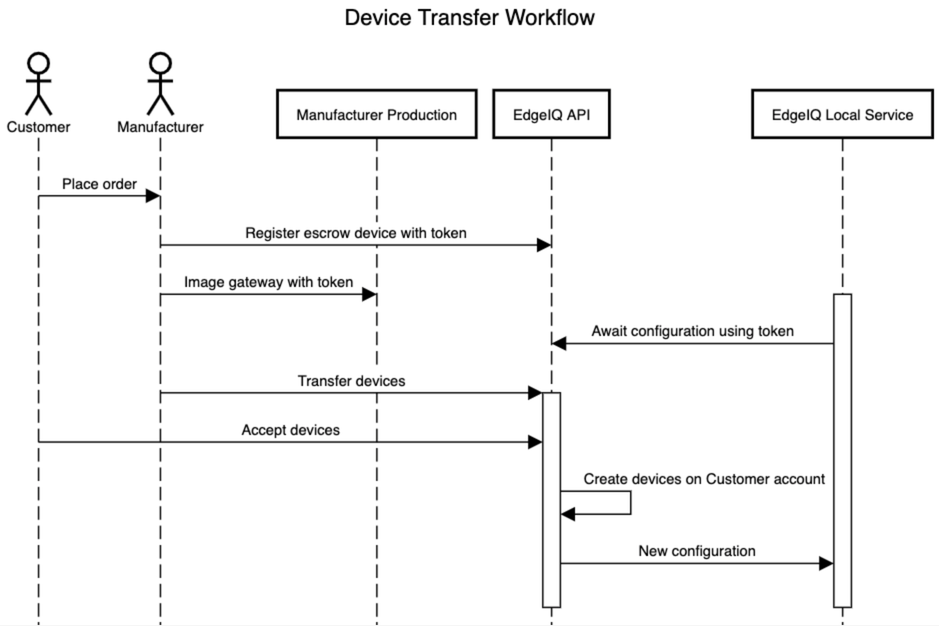
Both the customer and manufacturer must complete several reciprocal steps in the process, which is given here:
Step 1 — The customer places an order for the device from a manufacturer.
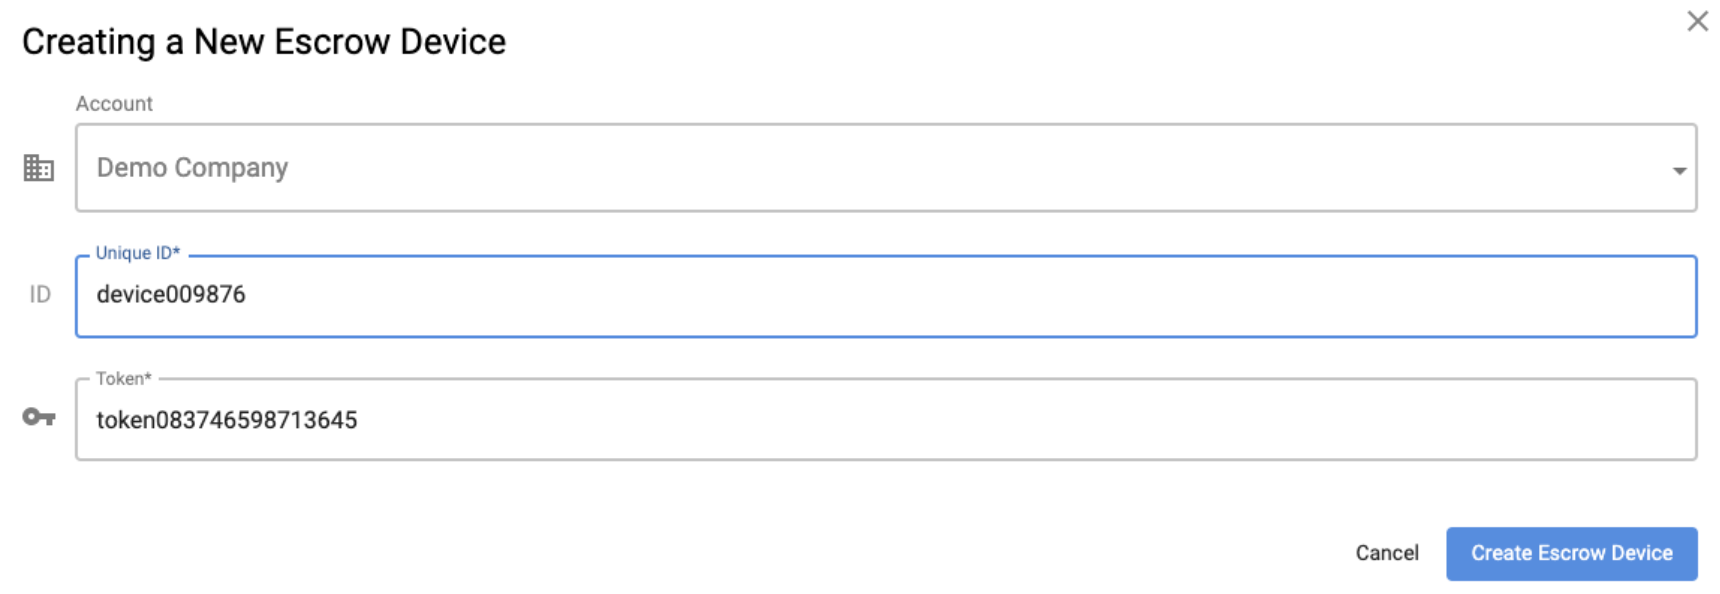
Step 2 — The manufacturer registers the escrow device with a token.
To create an escrow device, go to Management > Devices > Escrow Devices and click + Create Escrow Device. Enter a Unique ID and Token for the device.
Step 3 — The manufacturer will need to image the device with a token. By default on Linux systems, the EdgeIQ service looks for this token within the /opt/escrow_token file.
Step 4 — Next, the customer connects and powers on the device. The local EdgeIQ service will phone home to the EdgeIQ API with the token and await its configuration.
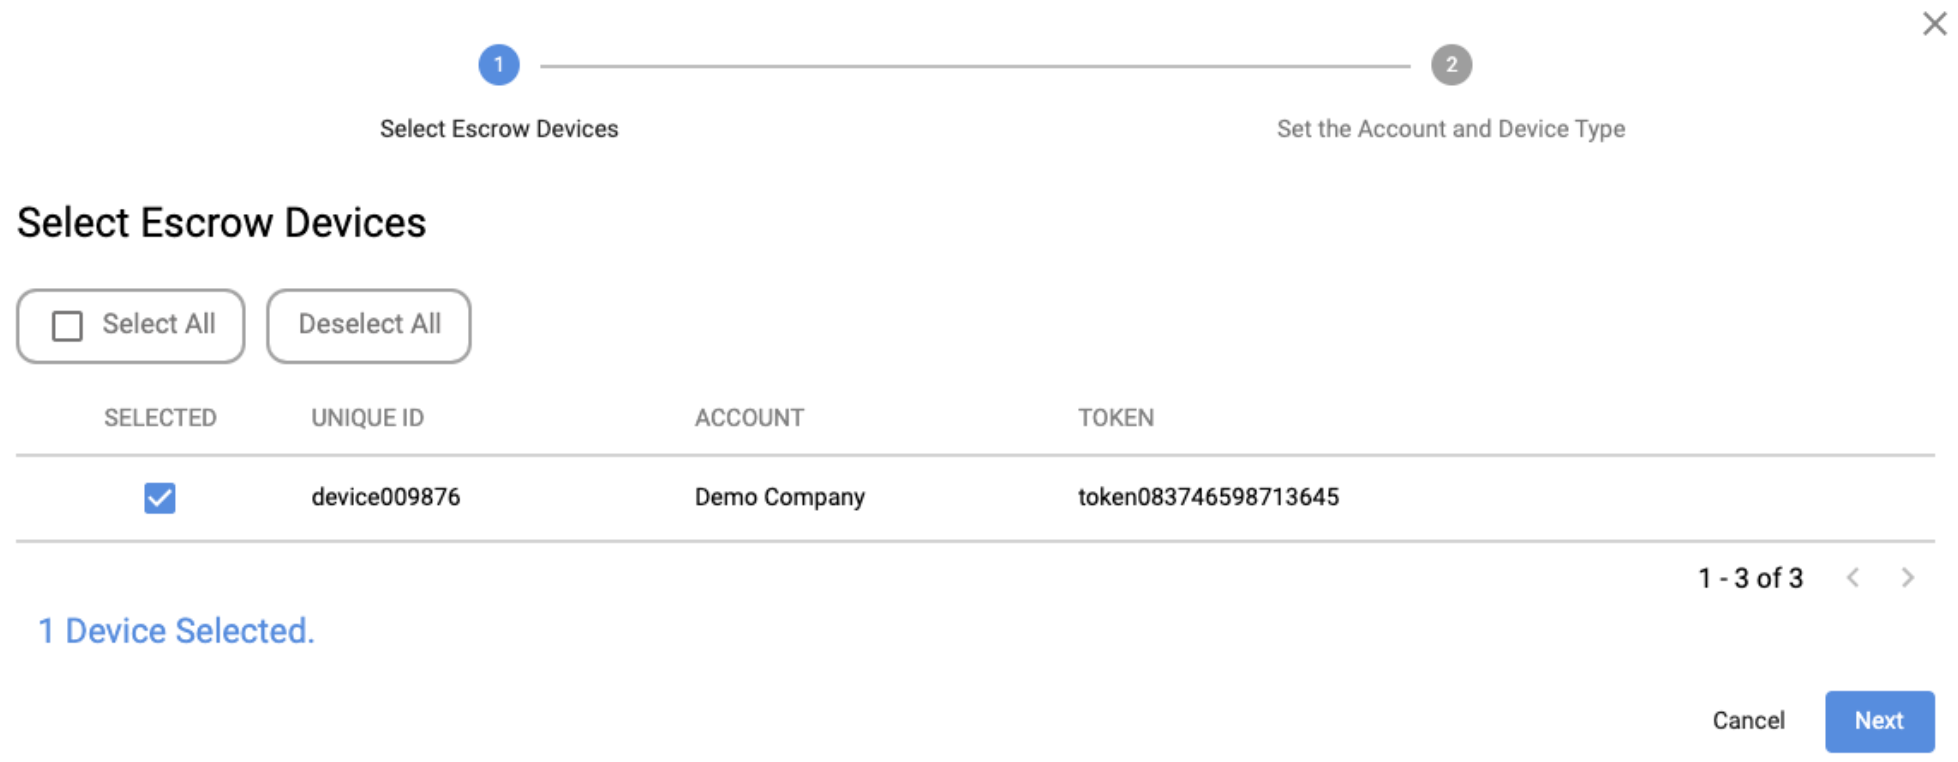
Step 5 — The manufacturer issues a transfer request for the device by navigating to Management > Devices > Escrow Devices and clicking Issue Transfer Request. Select the device from the list and select Next.
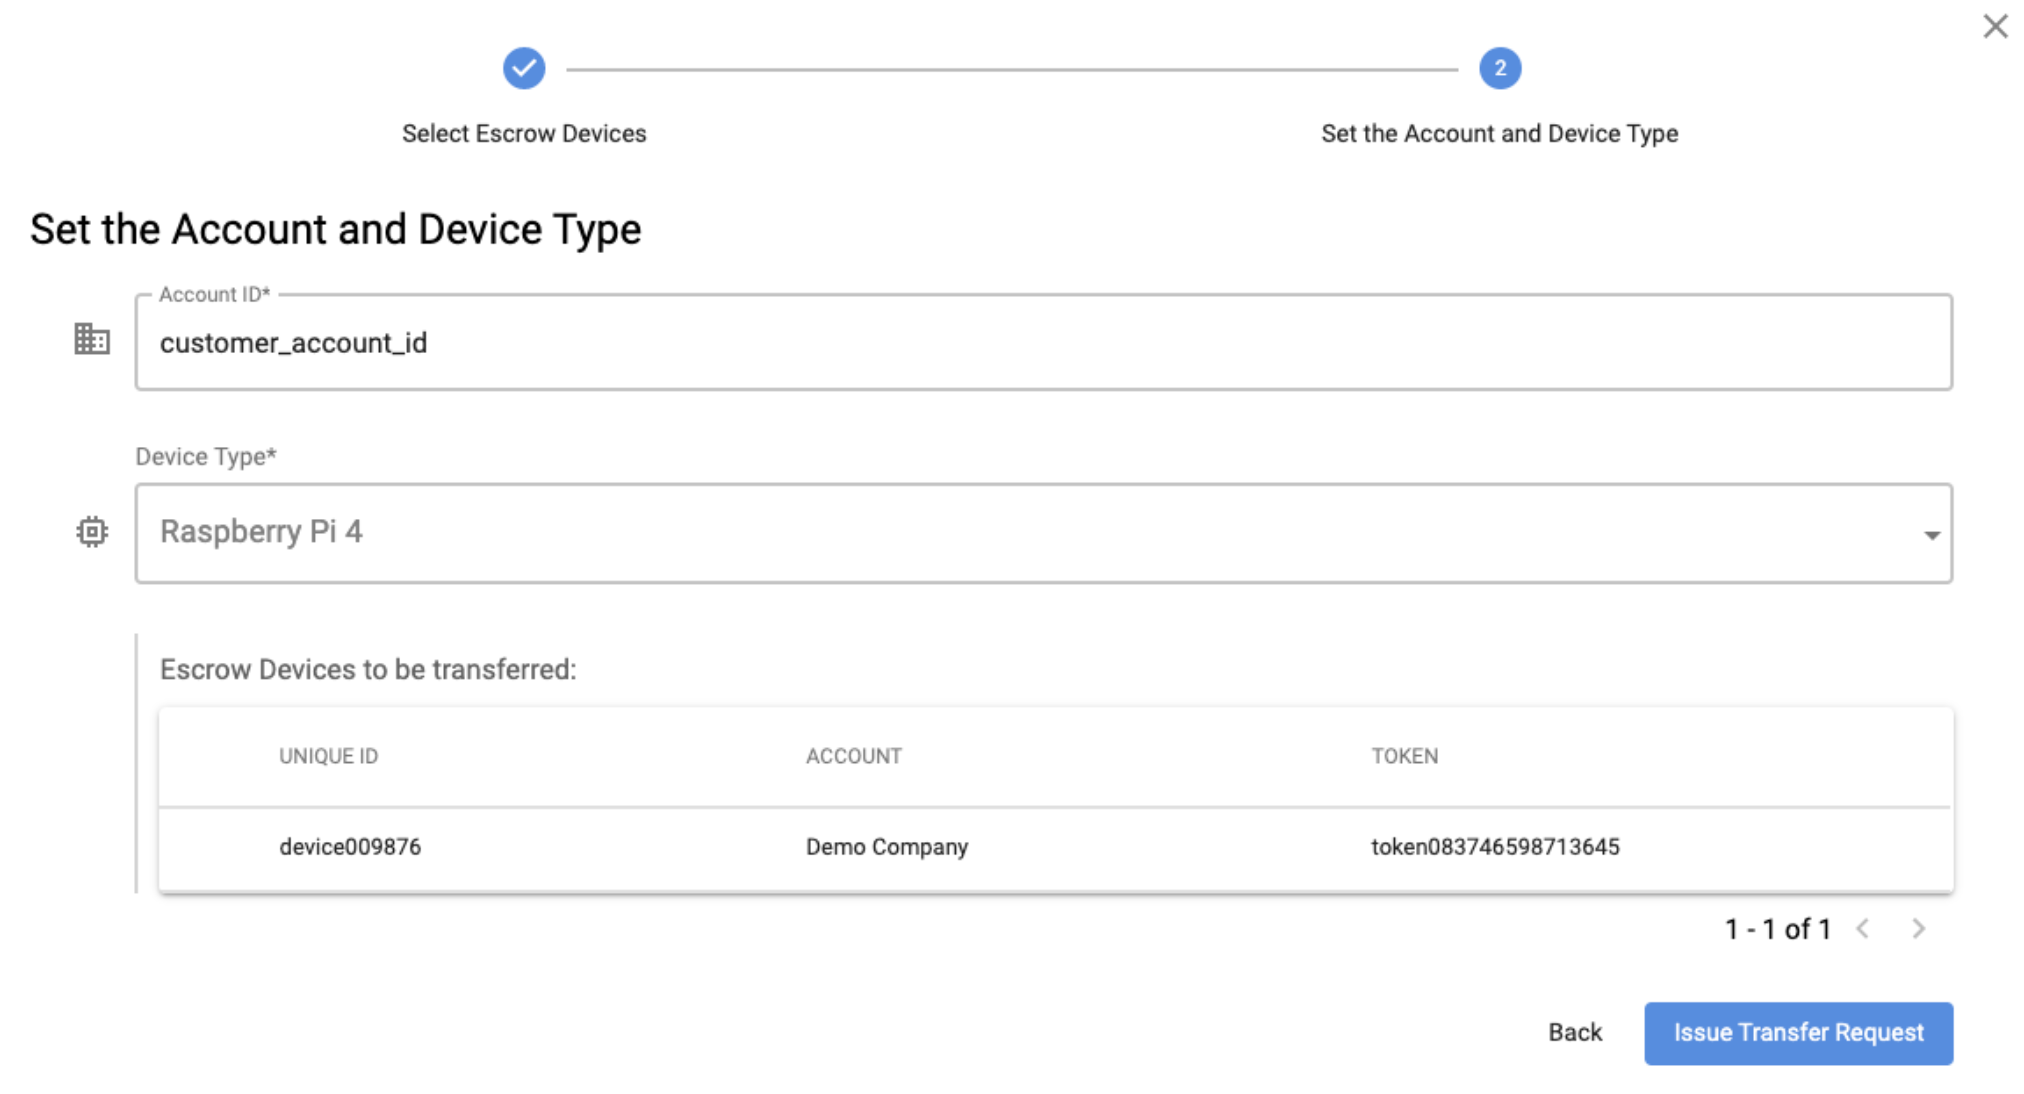
Enter the Account ID of the Customer and the Device Type, then click Issue Transfer Request.
Now, the Manufacturer can find the transfer request at Monitoring > Transfers > Transfers Sent.
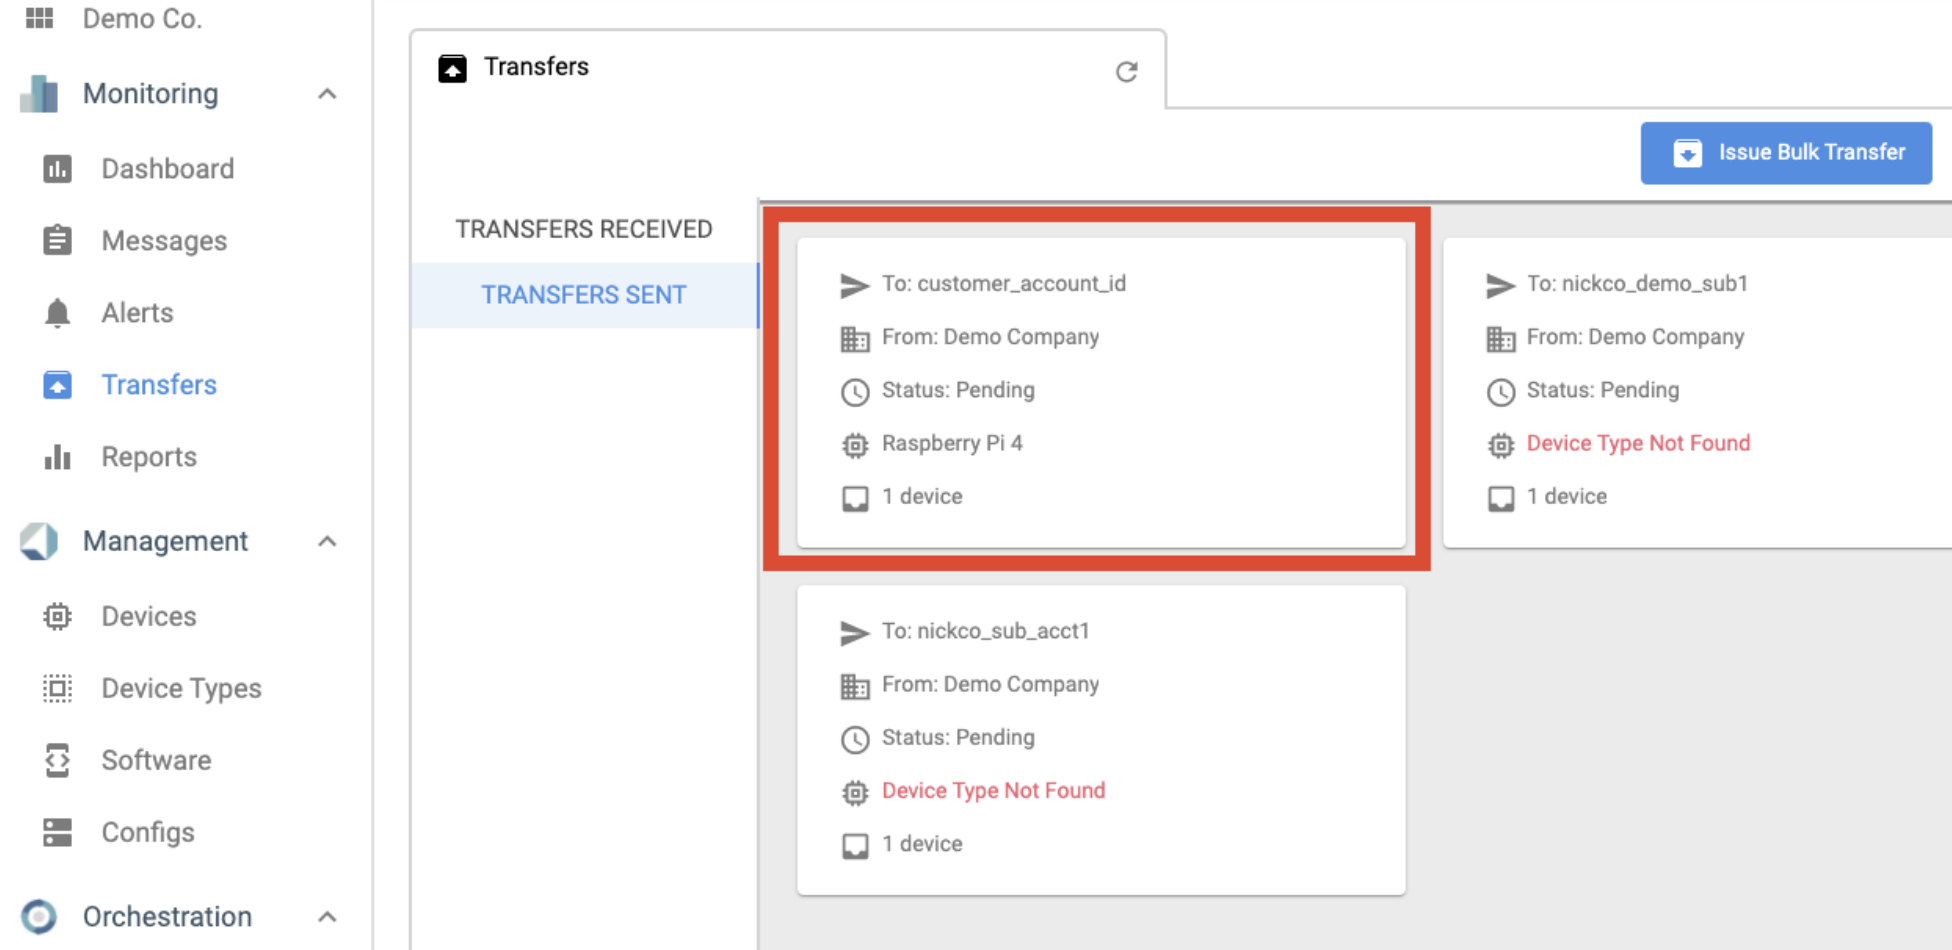
Step 6 — The customer can now accept the device transfer. Navigate to Monitoring > Transfers > Transfers Received, locate the device and click Accept Transfer.

In the pop up window, choose the Device Type profile to assign to this device, and then click Issue Transfer Request.

The device will now be transferred to your account and will show up under Devices.
Updated 5 months ago